If a laser cutter could talk, it would ask you one question before you buy: “What do you want to make—and how often?” I’ve helped teams and first-time makers set up their first laser workflows, and the best results come from matching the machine to your materials, space, and production goals. The good news: modern desktop options (like xTool’s ecosystem) make it realistic to go from design file to finished product without a factory-sized learning curve. This guide breaks down how a laser cutter works, what specs matter, and how to avoid the most common cutting and engraving mistakes.
What Is a Laser Cutter (and What Can It Do)?
A laser cutter is a computer-controlled machine that uses a focused beam to cut, score, or engrave material with high precision. In practice, it’s equal parts “printer” and “power tool”: you send a design, set parameters, and the machine traces your geometry with consistent results. Laser cutters are used for hobby crafts, product prototyping, signage, packaging, education labs, and small-batch manufacturing.
Typical laser cutter projects include:
- Cutting: wood (plywood, MDF), acrylic, paper, leather, some plastics (material-dependent)
- Engraving/marking: wood, coated metals, anodized aluminum, slate, glass (with technique)
- Production work: jigs, templates, labels, QR codes, product tags, inlays
For a deeper walk-through of the process and terminology, see xTool’s Laser Cutting: The Ultimate Guide.
How a Laser Cutter Works (Simple, Accurate Mental Model)
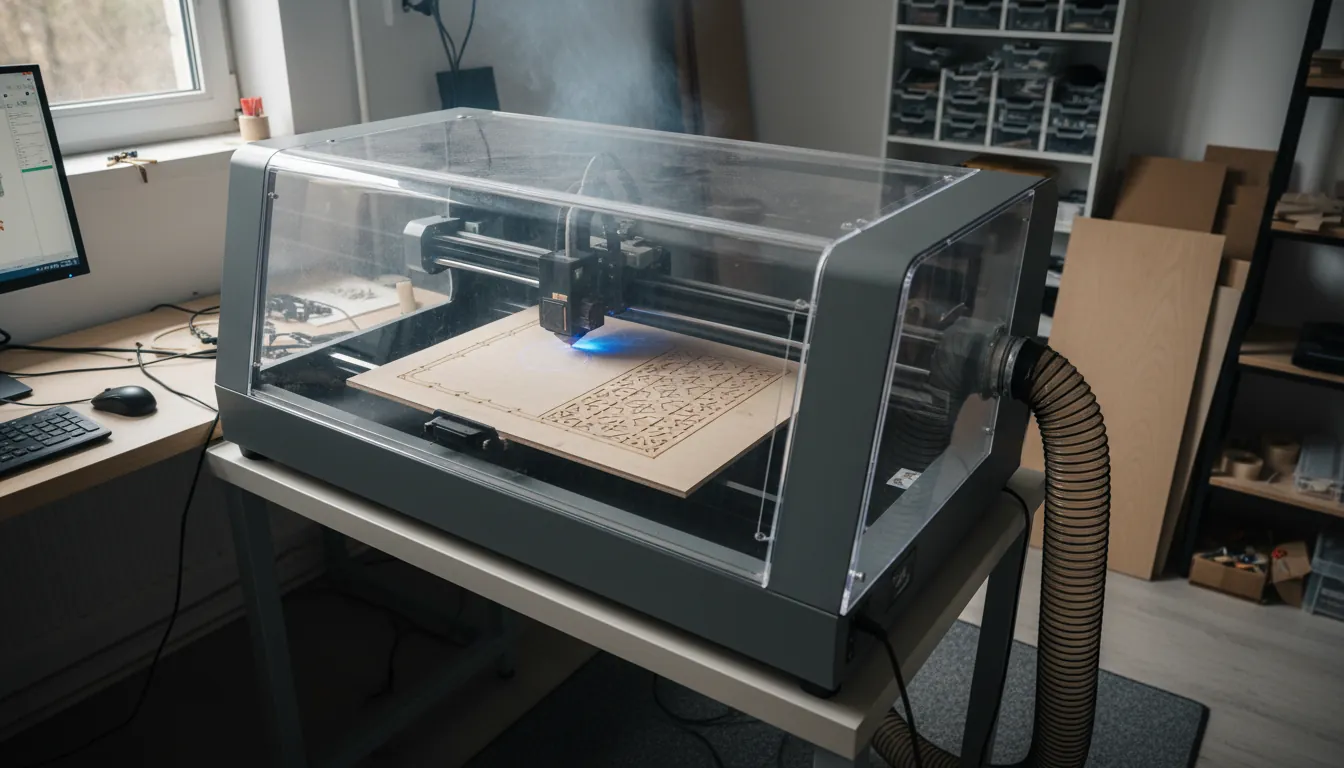
Think of your laser cutter as a controlled heat source with optics and motion. The beam is generated (by a diode, CO2 tube, fiber source, or UV source), then focused through a lens to a tiny spot. Wherever that spot travels, it rapidly heats the surface—either vaporizing it, melting it, or causing a controlled burn depending on the material and laser type.
Three concepts drive results more than anything else:
- Energy density at the focal point (focus + power)
- Dwell time (speed + number of passes)
- Material response (how it melts, burns, or reflects)
Industry overview and methods like “melt and blow” are described in Laser cutting (helpful for fundamentals and terminology).
Laser Cutter Types: Diode vs CO2 vs Fiber vs UV (What Each Is Best At)
You’ll see four common categories. Each can be “right”—but only when it matches your materials and output needs.
Diode laser cutter (great entry point, strong on wood)
Diode lasers are popular for desktop cutting and engraving on wood, leather, and many coated surfaces. They’re often compact and accessible, and many setups can be upgraded with better air assist and enclosures.
Best for:
- Wood crafts, light cutting, makerspaces, classrooms
- Compact home shops where budget and footprint matter
CO2 laser cutter (fast cutting on acrylic and wood)
CO2 lasers (often 10.6 µm wavelength) excel at cutting acrylic cleanly and processing wood quickly, especially at higher wattage. If signage, acrylic products, or thick wood cutting is a priority, a CO2 laser cutter is often the most satisfying “day one” experience.
Best for:
- Acrylic signs, gift products, thicker wood cutting
- Small business production where speed matters
If you’re shopping in this category, xTool’s CO2 lineup is worth comparing—start with the flagship class overview at xtool p3 the flagship 80w co2 laser cutter.
Fiber laser (metal marking powerhouse)
Fiber lasers (around 1.064 µm) are the go-to for metal marking and high-speed industrial-style engraving. Cutting metal is possible in certain configurations and thickness ranges, but many buyers choose fiber primarily for crisp, durable marks on metals.
Best for:
- Metal tags, tools, parts marking, serials, barcodes
- Production-grade metal engraving
If metal work is your main goal, this buyer-focused overview helps: Metal Laser Engraving Machines.
UV laser (ultra-precise, low heat effect on sensitive surfaces)
UV lasers are used when you want very fine detail and minimal heat impact—useful for certain plastics, coated materials, and high-precision marking needs.
Best for:
- Fine-detail marking, delicate materials, premium finishes
Key Laser Cutter Specs That Actually Matter (Skip the Marketing Noise)
Most “which laser cutter should I buy?” decisions come down to a handful of specs. Here’s what to prioritize.
- Laser type: determines what materials you can process well (see above).
- Power (W): affects max thickness, speed, and edge quality. More power often means faster cutting and fewer passes.
- Work area: defines maximum project size; consider common sheet sizes and your product dimensions.
- Motion system + speed: faster isn’t always better, but stable mechanics help with clean corners and consistent engraves.
- Focusing method: manual focus can be accurate; autofocus reduces setup errors and saves time in production.
- Enclosure + exhaust compatibility: this is safety and comfort, not “nice to have.”
- Software workflow: camera alignment, material presets, and repeatability features reduce wasted stock.
| Laser Type | Best Materials | Strengths | Limitations | Typical Users |
|---|---|---|---|---|
| Diode | Wood, leather, paper/cardstock, some coated metals (marking) | Affordable entry-level; compact; good for light cutting/engraving on organics | Slower and weaker cutting; limited on clear acrylic and bare metals; often needs air assist for cleaner cuts | Hobbyists, makerspaces, beginners |
| CO2 | Acrylic, wood, MDF, leather, paper, glass (engraving) | Clean cuts on acrylic/wood; fast on non-metals; large work areas common | Cannot directly mark/cut bare metals without coating/marking compound; more maintenance (mirrors/tube); bulky | Sign shops, crafters, small businesses |
| Fiber | Stainless steel, aluminum, brass, titanium, anodized/coated metals, some plastics | High-contrast metal marking; fast and precise; deep engraving possible | Poor for wood/acrylic cutting; higher upfront cost; smaller typical work areas | Manufacturers, machine shops, product branding |
| UV | Plastics (ABS/PC), glass, ceramics, PCB solder mask, coated metals | Ultra-fine, low-heat “cold” marking; minimal discoloration; excellent on delicate materials | Expensive; typically for marking not cutting; limited depth on metals | Electronics/medical/device marking, high-detail production |
Safety: The Non-Negotiables for Any Laser Cutter Setup
A laser cutter is a tool that produces heat, smoke, and potentially flame. The safest setup is the one you’ll actually use every time—so build it into your workflow.
Minimum safety checklist:
- Ventilation/exhaust to the outside or through a proper filtration system (follow local rules)
- Enclosure that reduces stray light and contains smoke
- Fire readiness: never run unattended; keep appropriate extinguisher nearby
- Material screening: avoid unknown plastics; some can produce toxic gases
- Clean optics + bed: reduces flare-ups and improves cut quality
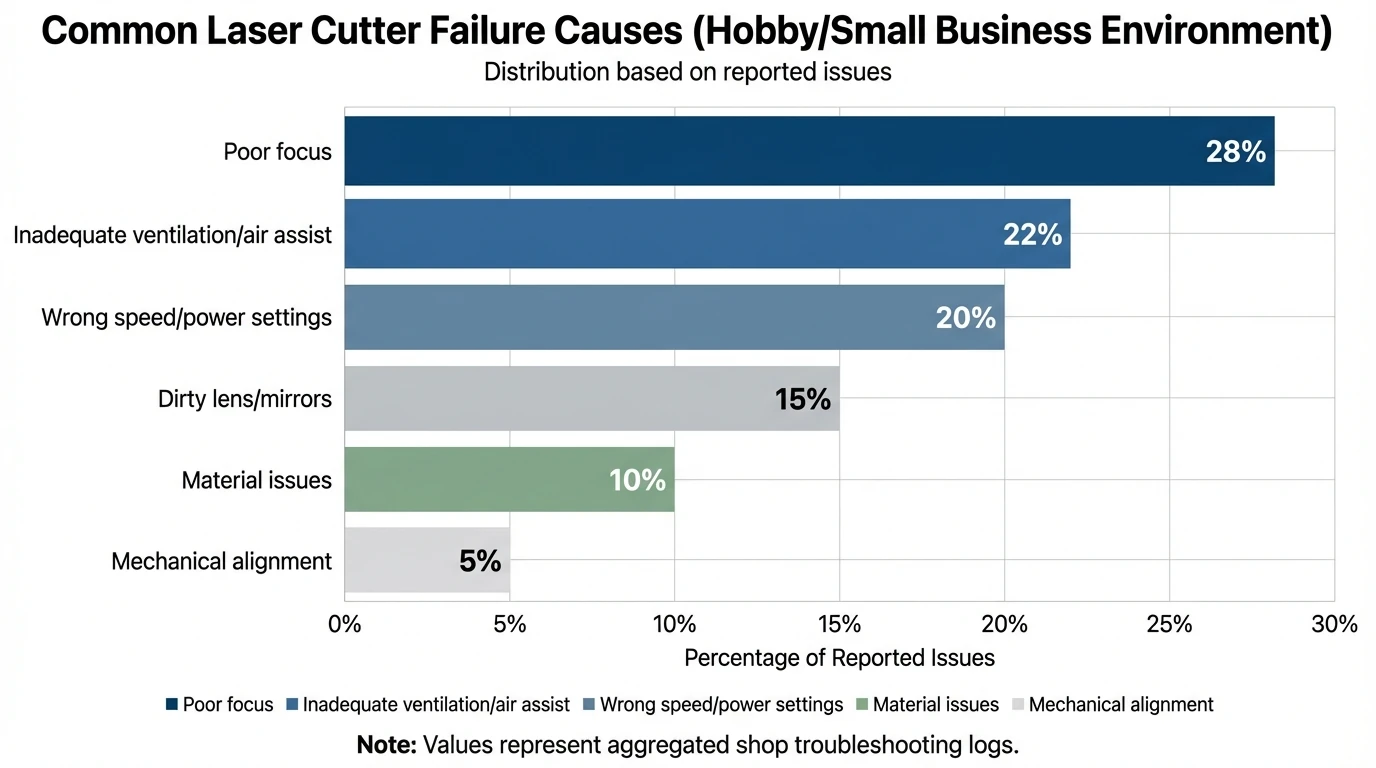
I’ve found most “laser cutter problems” people blame on software are actually airflow, focus, or dirty optics—all solvable with a 10-minute routine.
Laser Cutter Materials: What Cuts Cleanly vs What Causes Headaches
Material choice is where quality and profitability are won or lost. Even with the “right” laser cutter, material grade and adhesives matter.
Cuts cleanly (typical):
- Cast acrylic (especially on CO2)
- Quality birch plywood designed for laser cutting
- Paper/cardstock (low power, higher speed)
Common trouble materials:
- Plywood with inconsistent glue layers (causes uncut spots)
- Some clear plastics that melt or haze
- Unknown vinyl/PVC-like sheets (avoid due to toxic fumes)
Pro tip from my own tests: I got a dramatic edge-quality upgrade on plywood by combining strong air assist + slightly higher speed + multiple passes, instead of “slow and hot” in a single pass. The slower/hotter approach often deepens charring and widens kerf.
Dialing In Settings: A Repeatable Method That Saves Material
Instead of guessing, build a mini process you can repeat for every new material batch.
- Confirm focus on the actual surface height (not “close enough”).
- Run a small test grid of speed/power (and passes if needed).
- Inspect the edge: look for char, taper, melt ridges, or incomplete cut fibers.
- Adjust one variable at a time:
- If not cutting through: add a pass or slow slightly (don’t always jump power).
- If edges are charred: increase speed, reduce power, increase air assist.
- If engraving is muddy: refocus and reduce line interval / adjust speed.
This approach turns your laser cutter into a predictable production tool rather than a “trial-and-error box.”
Common Laser Cutter Problems (and Fixes You Can Do Today)
| Problem | Likely Cause | Fast Fix | Prevention |
|---|---|---|---|
| Burnt edges | Too slow / too much power / low air assist | Increase speed, lower power, enable/boost air assist | Use cut presets; keep air assist on; test cuts on scrap |
| Won’t cut through | Wrong focus / insufficient power / poor plywood glue | Refocus, add a pass or slow slightly, try different plywood/MDF | Verify focus before jobs; use quality materials; maintain optics |
| Engraving looks blurry | Out of focus / dirty lens | Refocus; clean lens and mirrors (per manufacturer guidance) | Regular lens cleaning; run a focus check at start of day |
| Flare-ups | Dirty bed / poor exhaust | Pause job, extinguish safely, clean bed, improve airflow/exhaust | Clean honeycomb/slats; keep exhaust filters/ducting maintained |
| Misaligned design | Workholding shifted / camera calibration off | Re-square and clamp material; re-calibrate camera/registration marks | Use jigs/clamps; verify camera calibration periodically |
Quick wins I use most often:
- Clean your lens (and mirrors if applicable) before re-running “mystery” jobs.
- Improve air assist to reduce flame and charring while keeping edges sharper.
- Use better stock (laser-grade plywood and cast acrylic) when consistency matters.
- Add simple jigs for repeat jobs—repeatability is profit.
Laser Cutter Use Cases: Hobby, Classroom, and Small Business
A laser cutter fits different lives in different ways. Here’s how I see it used successfully.
Home and DIY
You’ll value:
- Simple setup, compact footprint, and low-maintenance workflow
- Reliable engraving for personalization and gifts
Education and makerspaces
You’ll value:
- Safety features, enclosed designs, and easy supervision workflows
- Repeatable projects for teaching design thinking and prototyping
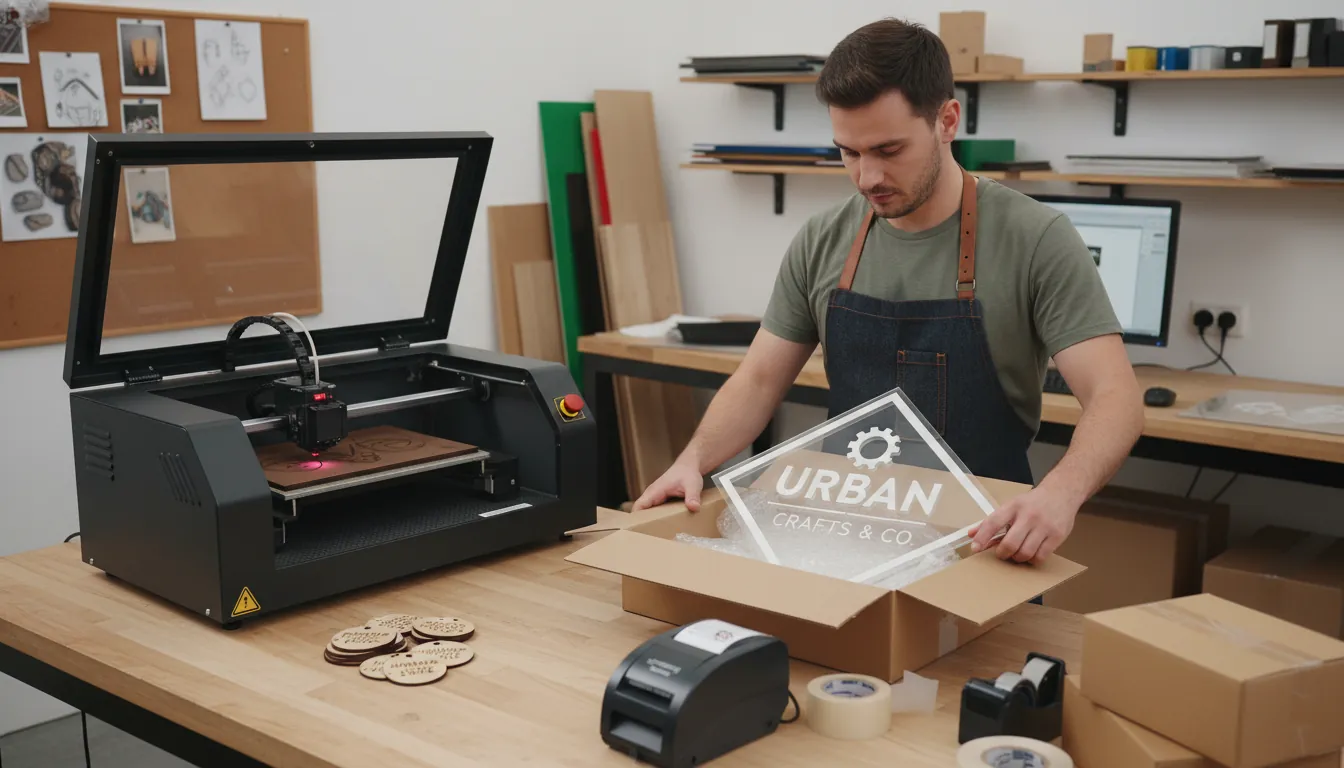
Small business production
You’ll value:
- Speed, material compatibility, and consistent results shift after shift
- Camera alignment, presets, and automation features that reduce labor time
If you’re cost-planning for a business, it helps to map total cost (machine + ventilation + materials + time). This guide is a solid baseline: How Much Does A Laser Cutting Machine Cost?.
What to Look for in a “Best” Laser Cutter in 2026
A “best laser cutter” isn’t one model—it’s a checklist.
Prioritize these buying criteria:
- Material fit (your top 3 materials decide the laser type)
- Safe workflow (enclosure + exhaust path you’ll actually use)
- Repeatability (camera, jigs, software presets, stable mechanics)
- Support ecosystem (documentation, community, accessories, replacement parts)
- Upgrade path (rotary tools, honeycomb bed, air assist, filtration)
For third-party perspective on popular desktop machines and categories, see CNET’s roundup: I’ve Tested the Best Laser Cutters and Engravers of 2025.
$30 Laser Air Assist Upgrade/How to guide
Why xTool Fits Many Laser Cutter Buyers (Without Overcomplicating It)
xTool’s strength is that it treats the laser cutter as part of a full making ecosystem—machine, software workflow, accessories, materials, and learning resources. In my experience, that ecosystem approach matters more than people expect, because most frustration comes from small workflow gaps (alignment, ventilation, repeat jobs), not the beam itself.
If you want an enclosed, desktop-friendly starting point, the xTool S1 Enclosed Diode Laser Cutter is positioned for safer everyday use and cleaner home-shop workflows. If your roadmap includes acrylic-heavy products or faster cutting, stepping into a CO2 platform can make production feel dramatically smoother.
Conclusion: Pick the Laser Cutter That Matches Your Real Life (Not Just Specs)
A laser cutter is like a reliable shop partner: when it’s well-matched to your materials and supported by a safe, repeatable setup, it quietly turns ideas into sellable products. I’ve seen beginners succeed fastest when they stop chasing “max wattage” and instead optimize for material fit, enclosure/ventilation, and workflow repeatability. If you’re choosing between diode, CO2, fiber, or UV, start from what you’ll cut every week, then buy the system that makes that work easy.
FAQ: Laser Cutter Questions People Search (Answered)
1) What’s the best laser cutter for beginners?
An enclosed diode laser cutter is often the easiest entry point for wood and basic projects, especially if you want a simpler home setup and safer daily operation.
2) Is a CO2 laser cutter better than a diode laser cutter?
For acrylic cutting and faster wood cutting, CO2 is often better. For budget-friendly entry and many wood/leather projects, diode can be a great fit.
3) Can a laser cutter cut metal?
Some systems can cut thin metals, but many buyers use fiber lasers primarily for metal marking/engraving. Your target thickness and metal type determine feasibility.
4) What materials should I avoid in a laser cutter?
Avoid unknown plastics, and especially anything PVC/vinyl-like, because it can release hazardous fumes and damage equipment.
5) Why are my laser-cut edges burnt or dark?
Common causes are low speed, too much power, weak air assist, or poor material quality. Improve air assist and run a quick test grid to rebalance speed/power.
6) Do I need an enclosure and ventilation for a desktop laser cutter?
Yes. Smoke and fumes are part of the process. An enclosure plus proper exhaust/filtration makes the workflow safer and far more pleasant.
7) How do I choose laser cutter power (watts)?
Choose based on material type, thickness, desired speed, and production volume. Higher power typically means faster cuts and fewer passes, especially on thicker stock.